Keeping your dog’s ears clean is an important part of their overall health and grooming routine. Dirty ears can lead to infections, discomfort, unpleasant odors, and hearing problems. However, cleaning your dog’s ears incorrectly can cause irritation or injury. This guide explains how to clean your dog’s ears safely and effectively.
Why Regular Ear Cleaning Matters
Dogs can accumulate dirt, wax, moisture, and debris inside their ears. Breeds with floppy ears, such as Cocker Spaniel and Basset Hound, are particularly prone to ear issues because airflow is limited.
Benefits of regular ear cleaning include:
- Preventing ear infections
- Reducing unpleasant odors
- Removing excess wax and debris
- Improving comfort and hearing
- Allowing early detection of ear problems
Signs Your Dog’s Ears Need Cleaning


Watch for these signs that indicate your dog’s ears may need attention:
- Excessive scratching around the ears
- Head shaking or tilting
- Visible dirt or wax buildup
- Redness or inflammation
- Unpleasant smell coming from the ears
- Sensitivity when the ears are touched
If you notice severe redness, swelling, bleeding, or discharge, consult a veterinarian before attempting to clean the ears yourself.
Supplies You’ll Need
Before starting, gather the following items:
- Veterinarian-approved dog ear cleaner
- Cotton balls or soft gauze pads
- Towels
- Dog treats for positive reinforcement
Avoid using cotton swabs deep inside the ear canal, as they can push debris further in and potentially damage the ear.
Step-by-Step Guide to Cleaning Dog Ears
1. Choose a Calm Environment
Select a quiet location where your dog feels comfortable. Have treats ready to reward good behavior throughout the process.
2. Inspect the Ears
Look inside each ear for signs of irritation, injury, parasites, or excessive wax buildup. If anything appears abnormal, seek veterinary advice.
3. Apply the Ear Cleaner
Hold the ear flap gently upright and squeeze the recommended amount of ear-cleaning solution into the ear canal. Follow the product’s instructions carefully.
4. Massage the Base of the Ear
Gently massage the base of the ear for 20–30 seconds. You should hear a soft squishing sound as the solution loosens dirt and wax.
5. Let Your Dog Shake
Allow your dog to shake its head naturally. This helps bring loosened debris toward the outer part of the ear.
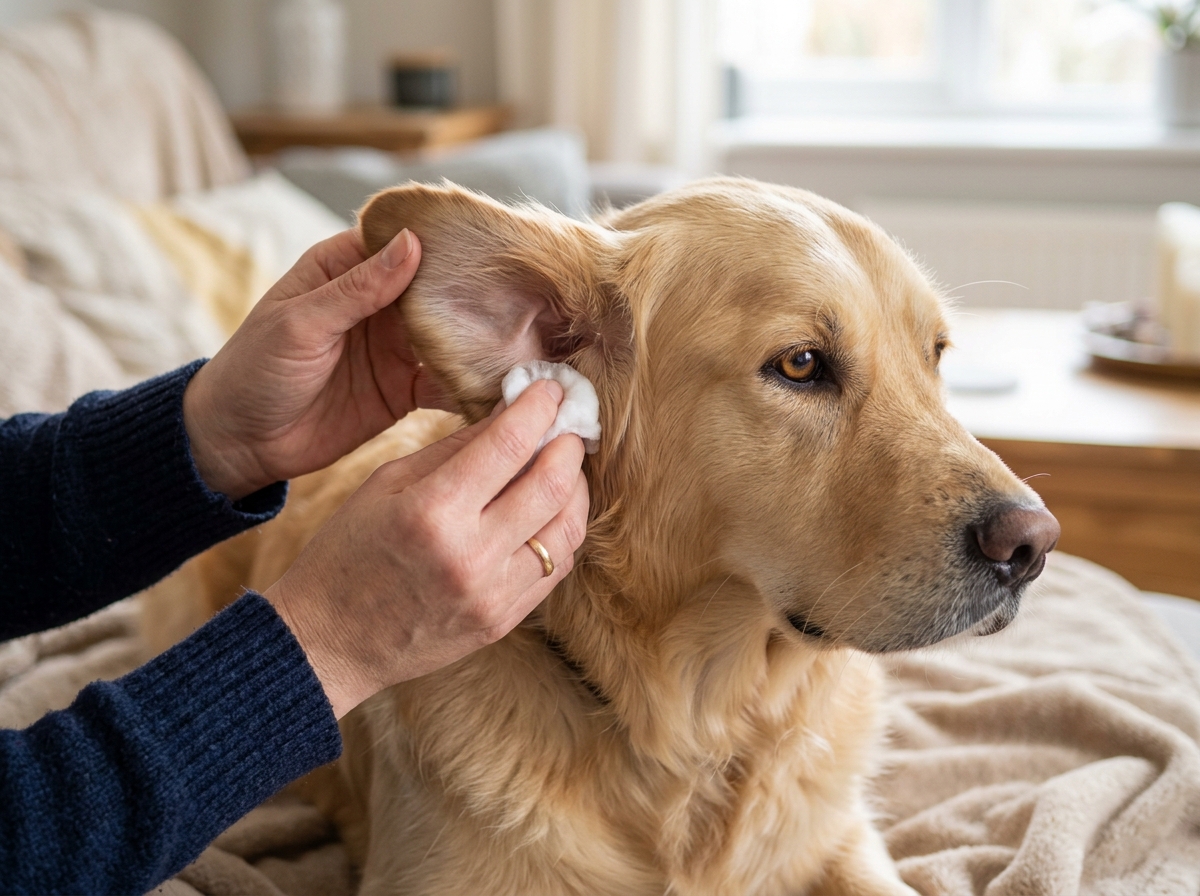
6. Wipe Away Debris
Use a cotton ball or gauze pad to wipe away visible dirt, wax, and excess solution from the outer ear.
Common Mistakes to Avoid


To keep your dog safe, avoid these common mistakes:
- Using alcohol or hydrogen peroxide without veterinary guidance
- Inserting cotton swabs deep into the ear canal
- Cleaning too aggressively
- Ignoring signs of infection
- Using products designed for humans
How Often Should You Clean Your Dog’s Ears?
The ideal cleaning frequency depends on your dog’s breed, lifestyle, and ear health.
- Most dogs: Every 2–4 weeks
- Dogs that swim frequently: Weekly checks and cleaning as needed
- Dogs with chronic ear problems: Follow your veterinarian’s recommendations
Over-cleaning can irritate the ears, so only clean when necessary.
When to Contact a Veterinarian
Schedule a veterinary visit if your dog experiences:
- Persistent odor
- Yellow, brown, or bloody discharge
- Swelling or severe redness
- Frequent ear infections
- Pain when the ears are touched
- Balance problems or hearing loss
These symptoms may indicate an infection or underlying medical condition requiring professional treatment.
Final Thoughts
Cleaning your dog’s ears safely is a simple but important part of pet care. By using the proper supplies, following a gentle cleaning process, and monitoring for signs of infection, you can help keep your dog’s ears healthy and comfortable. Regular ear checks combined with proper hygiene can prevent many common ear problems and contribute to your dog’s overall well-being.


